> ## Documentation Index
> Fetch the complete documentation index at: https://docs.pezzo.ai/llms.txt
> Use this file to discover all available pages before exploring further.
# Tutorial: Observability
> In just a few lines of code, monitor your AI operations seamlessly.
## What you'll learn
You're going to learn how to easily use Pezzo to supercharge your AI operations with monitoring and observability. It takes just a few lines of code!
This tutorial assumes you already signed up to Pezzo Cloud and created a new
project. If you haven't done so, please [sign up to Pezzo
Cloud](https://app.pezzo.ai).
## Using Pezzo with OpenAI
Here is a code example:
```ts theme={null}
import OpenAI from "openai";
// Initialize the Pezzo client
const openai = new OpenAI({
baseURL: "https://proxy.pezzo.ai/openai/v1",
defaultHeaders: {
"X-Pezzo-Api-Key": "",
"X-Pezzo-Project-Id": "",
"X-Pezzo-Environment": "Production",
}
});
async function main() {
// Make calls to the OpenAI API as you normally would!
const completion = await openai.chat.completions.create(
{
model: "gpt-3.5-turbo",
temperature: 0,
messages: [
{
role: "user",
content: "Tell me 5 fun facts about yourself",
},
],
}
);
}
main();
```
```py theme={null}
import openai
openai.base_url = "https://proxy.pezzo.ai/openai/v1"
openai.default_headers = {
"X-Pezzo-Api-Key": "",
"X-Pezzo-Project-Id": "",
"X-Pezzo-Environment": "Production"
}
chat_completion = openai.chat.completions.create(
model="gpt-3.5-turbo",
messages=[
{
"role": "user",
"content": "Tell me 5 fun facts about yourself",
}
]
)
```
**Let's explain what's going on here:**
We import and instantiate the OpenAI client with a few additional parameters. First, the `baseURL` which tells the OpenAI client to proxy the request through Pezzo.
Then, we set a few default headers that will be present at any request made to OpenAI. These are:
* `X-Pezzo-Api-Key` - Your Pezzo API key. You can find it in your Organization page in [Pezzo Cloud](https://app.pezzo.ai).
* `X-Pezzo-Project-Id` - The ID of the project you want to use. You can find it anywhere [Pezzo Cloud](https://app.pezzo.ai).
* `X-Pezzo-Environment` - The name of the environment to use. By default, any Pezzo project is automatically created with a `Production` environment.
## Monitoring Requests
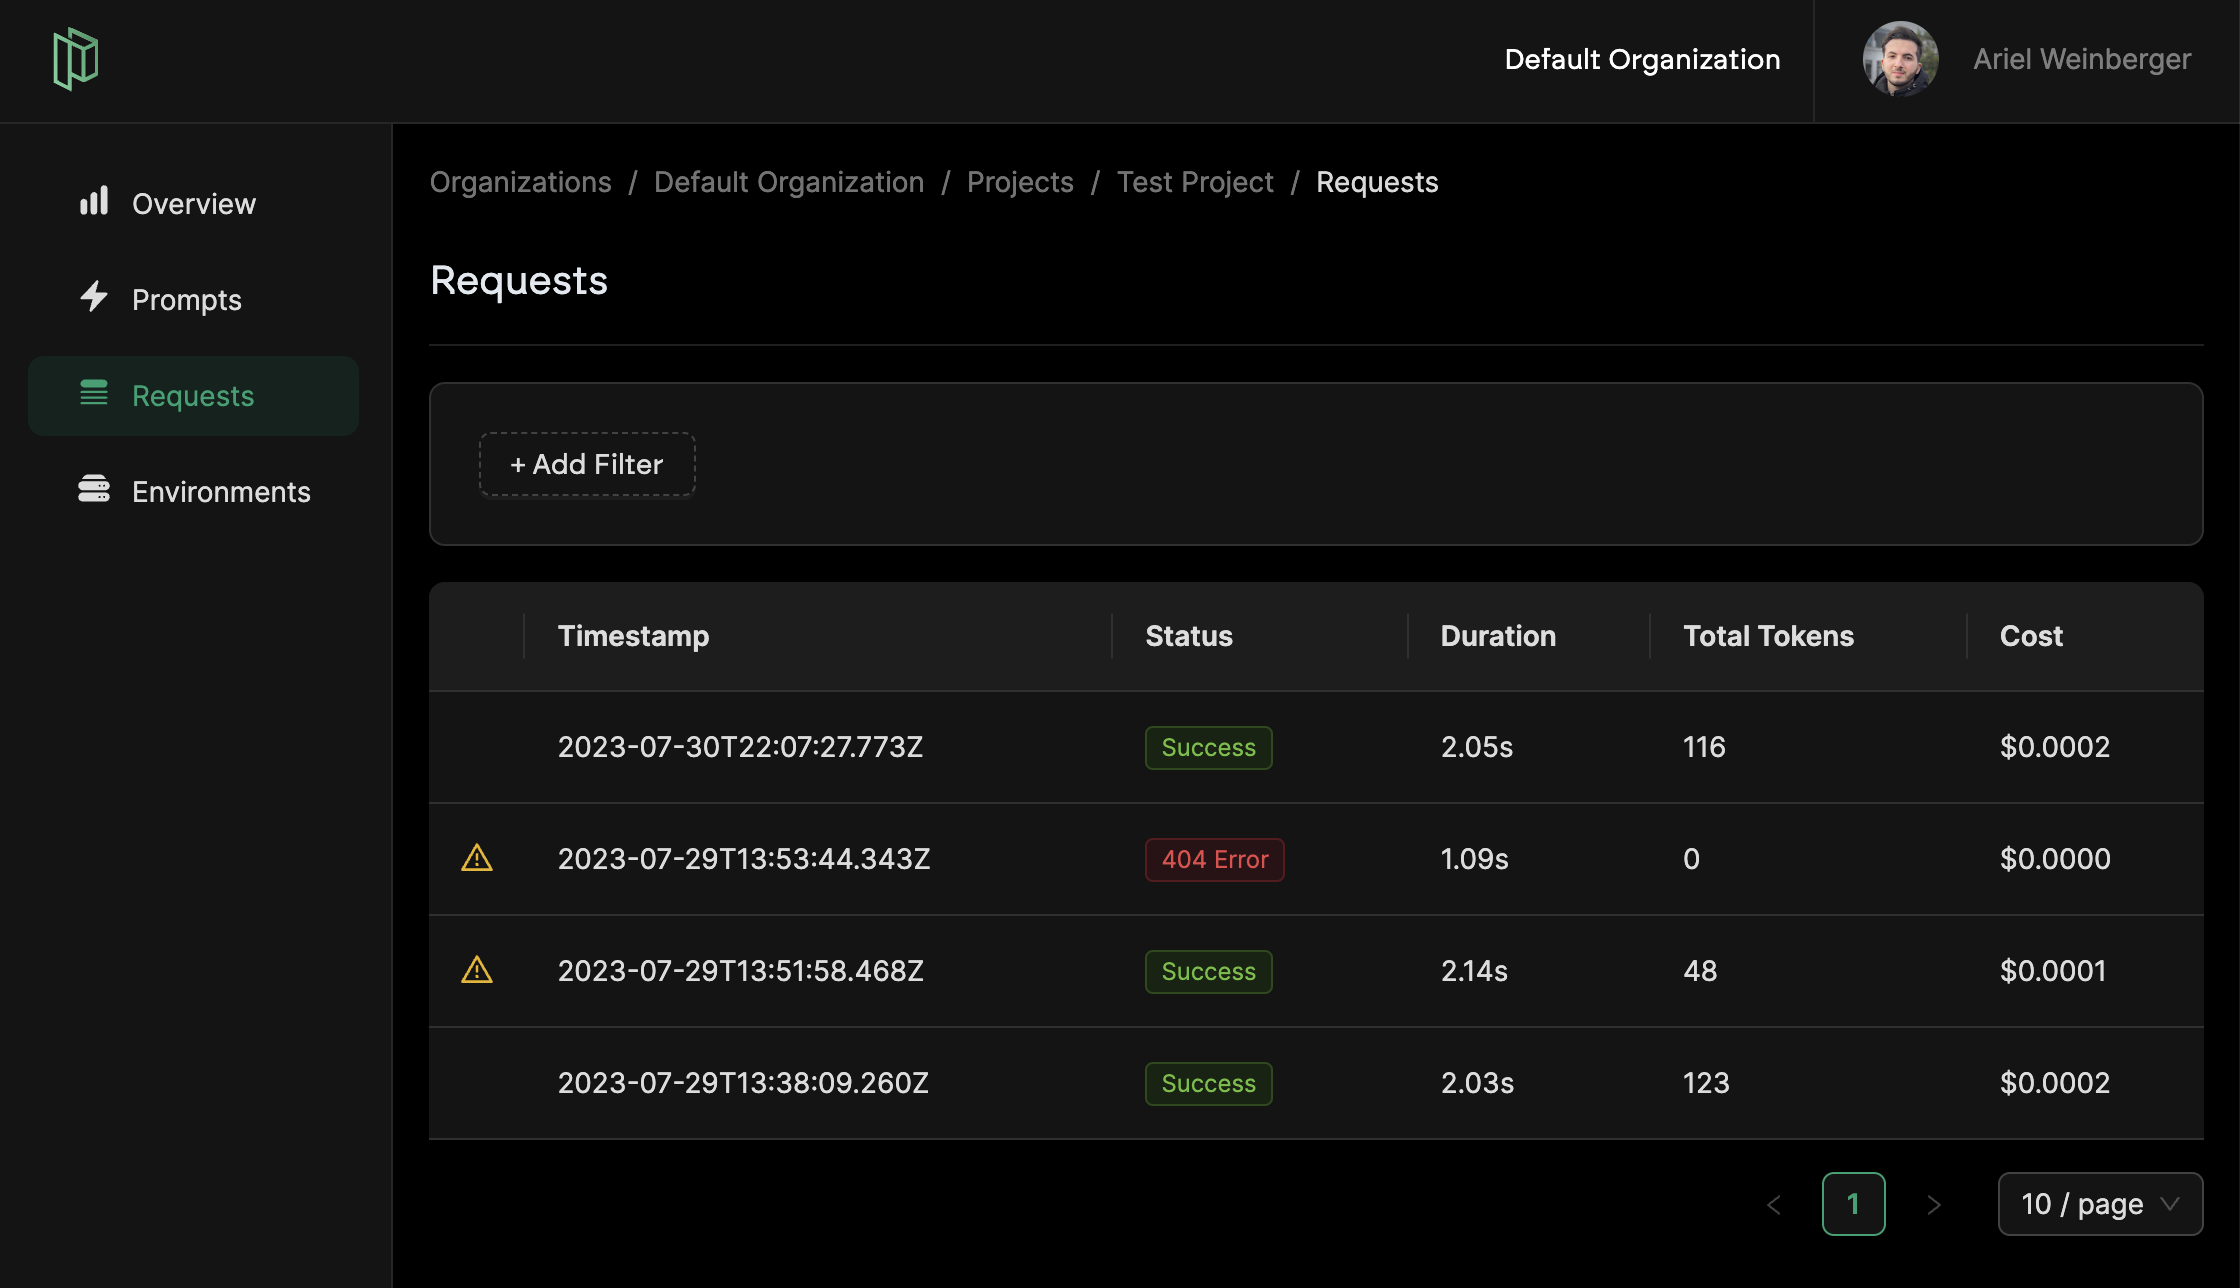
After integrating with Pezzo and making some requests to OpenAI, you should see all historical requests in the **Requests** view in Pezzo.
If you want to learn more about Pezzo's observability feature, check out the [Observability section in the docs](/platform/observability/overview).
 # Next Steps
Save up to 90% of your AI costs with Pezzo's request caching.
# Next Steps
Save up to 90% of your AI costs with Pezzo's request caching.