What you’ll learn
You’re going to learn how to easily use Pezzo to supercharge your AI operations with monitoring and observability. It takes just a few lines of code!This tutorial assumes you already signed up to Pezzo Cloud and created a new
project. If you haven’t done so, please sign up to Pezzo
Cloud.
Using Pezzo with OpenAI
Here is a code example:- Node.js
- Python
baseURL which tells the OpenAI client to proxy the request through Pezzo.
Then, we set a few default headers that will be present at any request made to OpenAI. These are:
X-Pezzo-Api-Key- Your Pezzo API key. You can find it in your Organization page in Pezzo Cloud.X-Pezzo-Project-Id- The ID of the project you want to use. You can find it anywhere Pezzo Cloud.X-Pezzo-Environment- The name of the environment to use. By default, any Pezzo project is automatically created with aProductionenvironment.
Monitoring Requests
After integrating with Pezzo and making some requests to OpenAI, you should see all historical requests in the Requests view in Pezzo. If you want to learn more about Pezzo’s observability feature, check out the Observability section in the docs.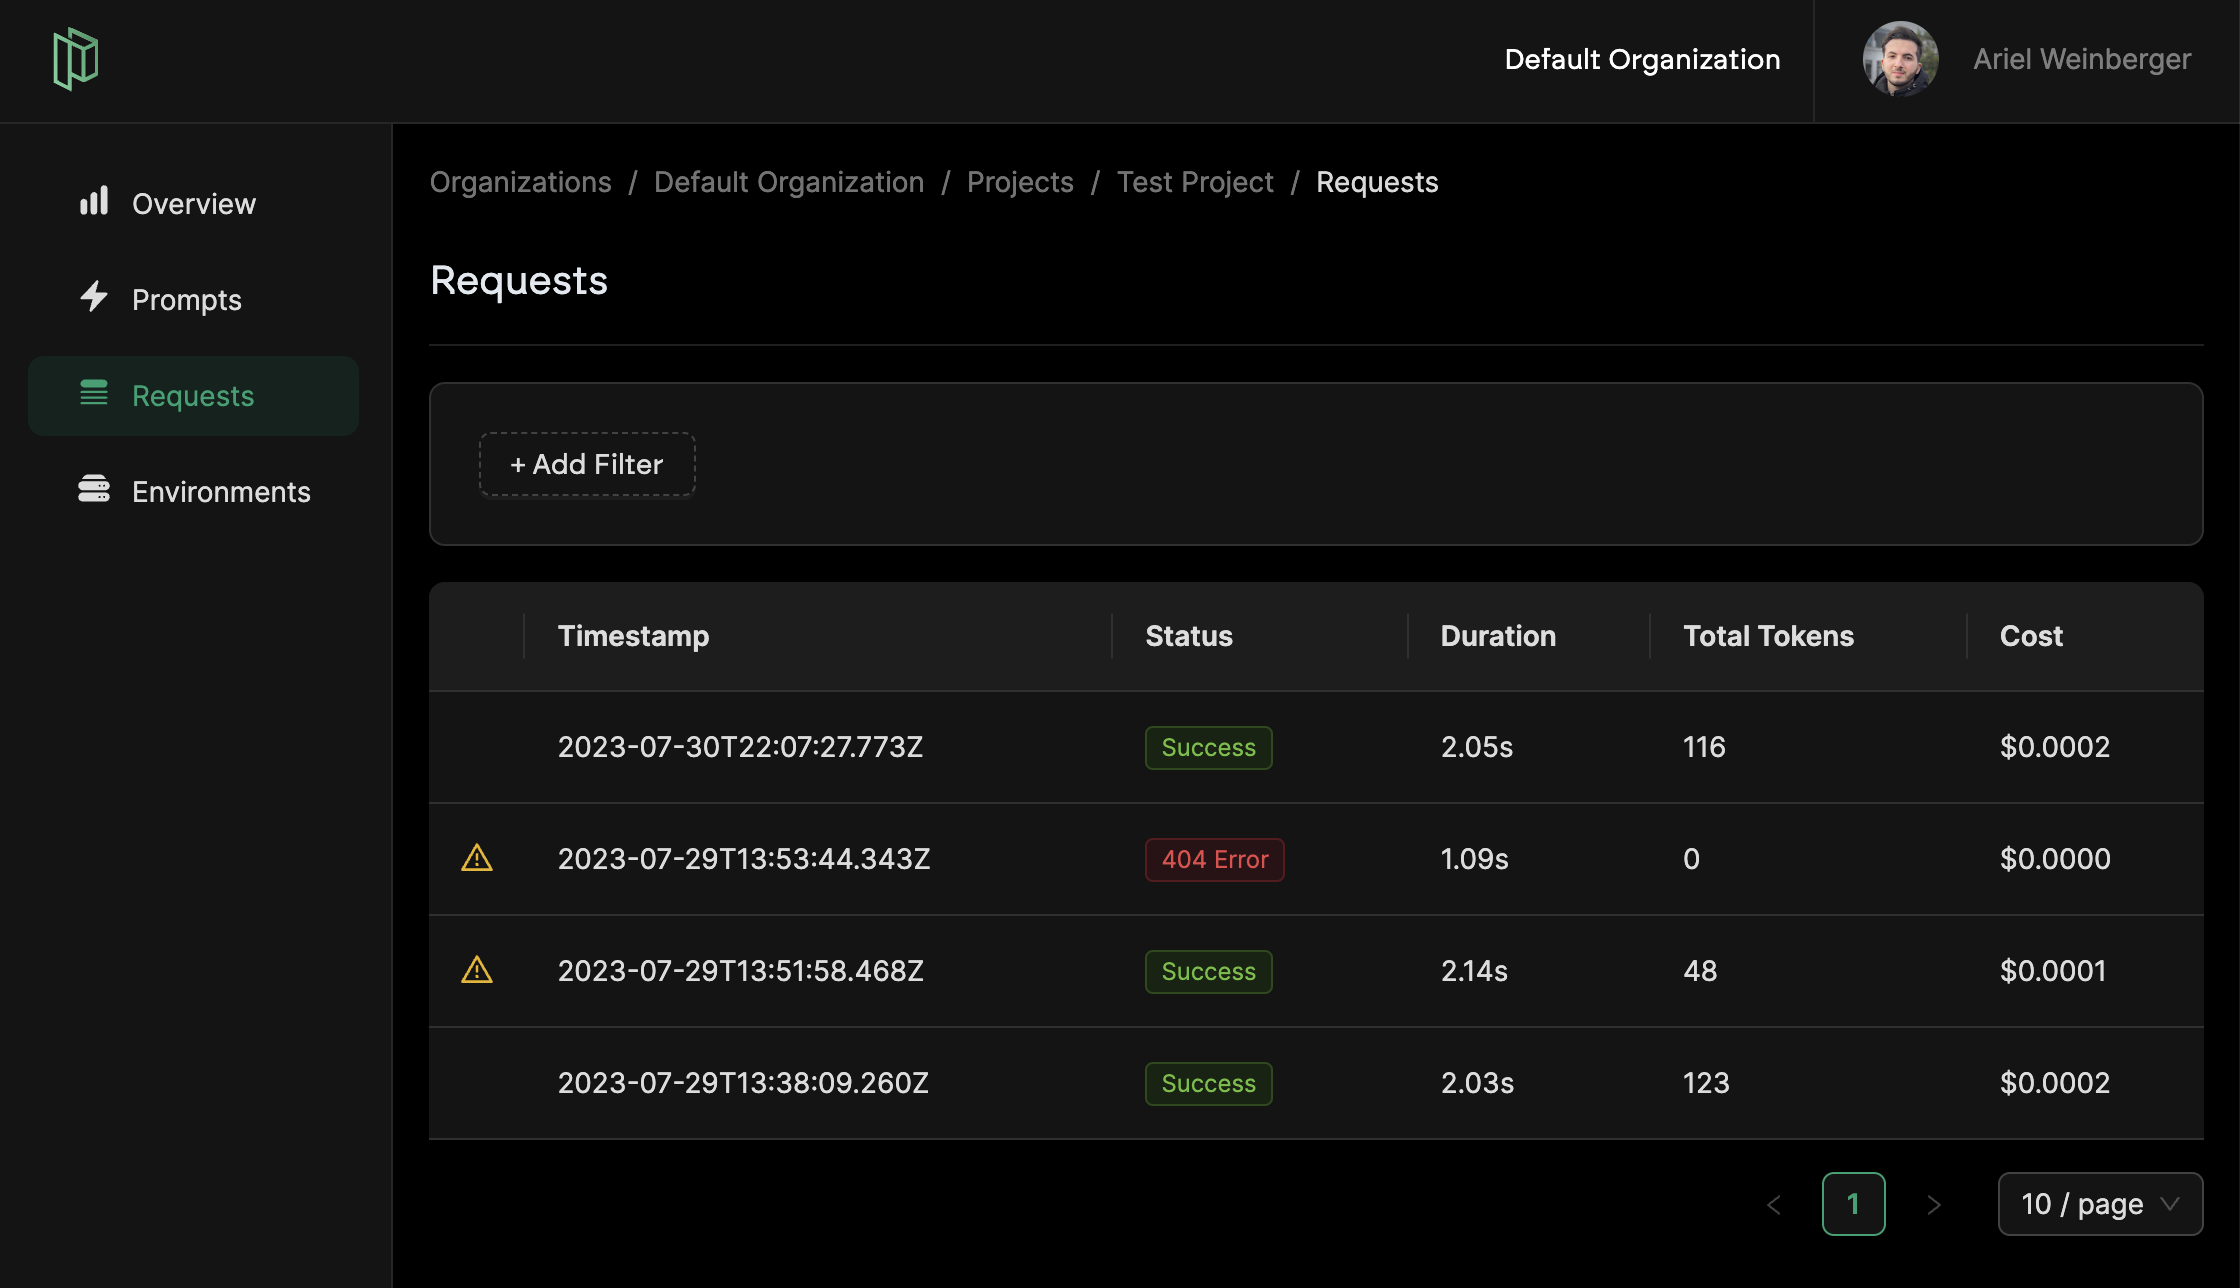
Pezzo Project Requests View
Next Steps
Request Caching
Save up to 90% of your AI costs with Pezzo’s request caching.