This tutorial is for users who want to manage their AI operations in Pezzo end-to-end. From prompt management, version control and instant delivery, all the way to monitoring and observability.

If you wish to only use Pezzo for monitoring and observability, check out the Observability Tutorial.

What you’ll learn

You’re going to learn how to manage your AI prompts with Pezzo, so you can streamline delivery and collaborate with your team. This includes:

  • Creating a prompt
  • Basic Prompt Engineering
  • Testing your prompt in the Pezzo Platform
  • Committing and publishing your prompt
  • Consuming your prompt using TypeScript

Are you ready? Let’s go!

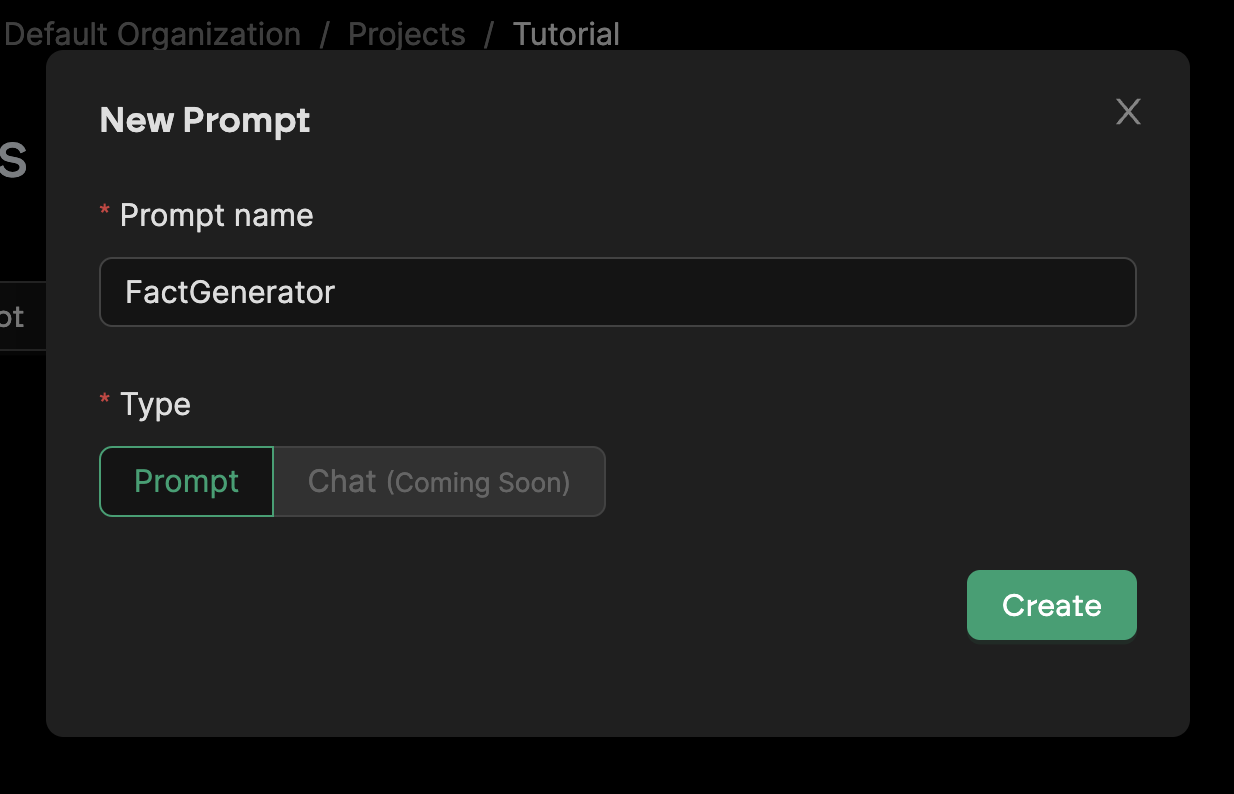
Create your first prompt

This tutorial assumes you already signed up to Pezzo Cloud and created a new project. If you haven’t done so, please sign up to Pezzo Cloud.

In the Prompts page, click the + New Prompt button. This will open a modal where you can create a new Prompt.

It’s best to choose a descriptive name for your prompt. Let’s call it FactGenerator.

New Prompt Modal

Hit Create and you will be taken to the Prompt page.

Prompt Engineering

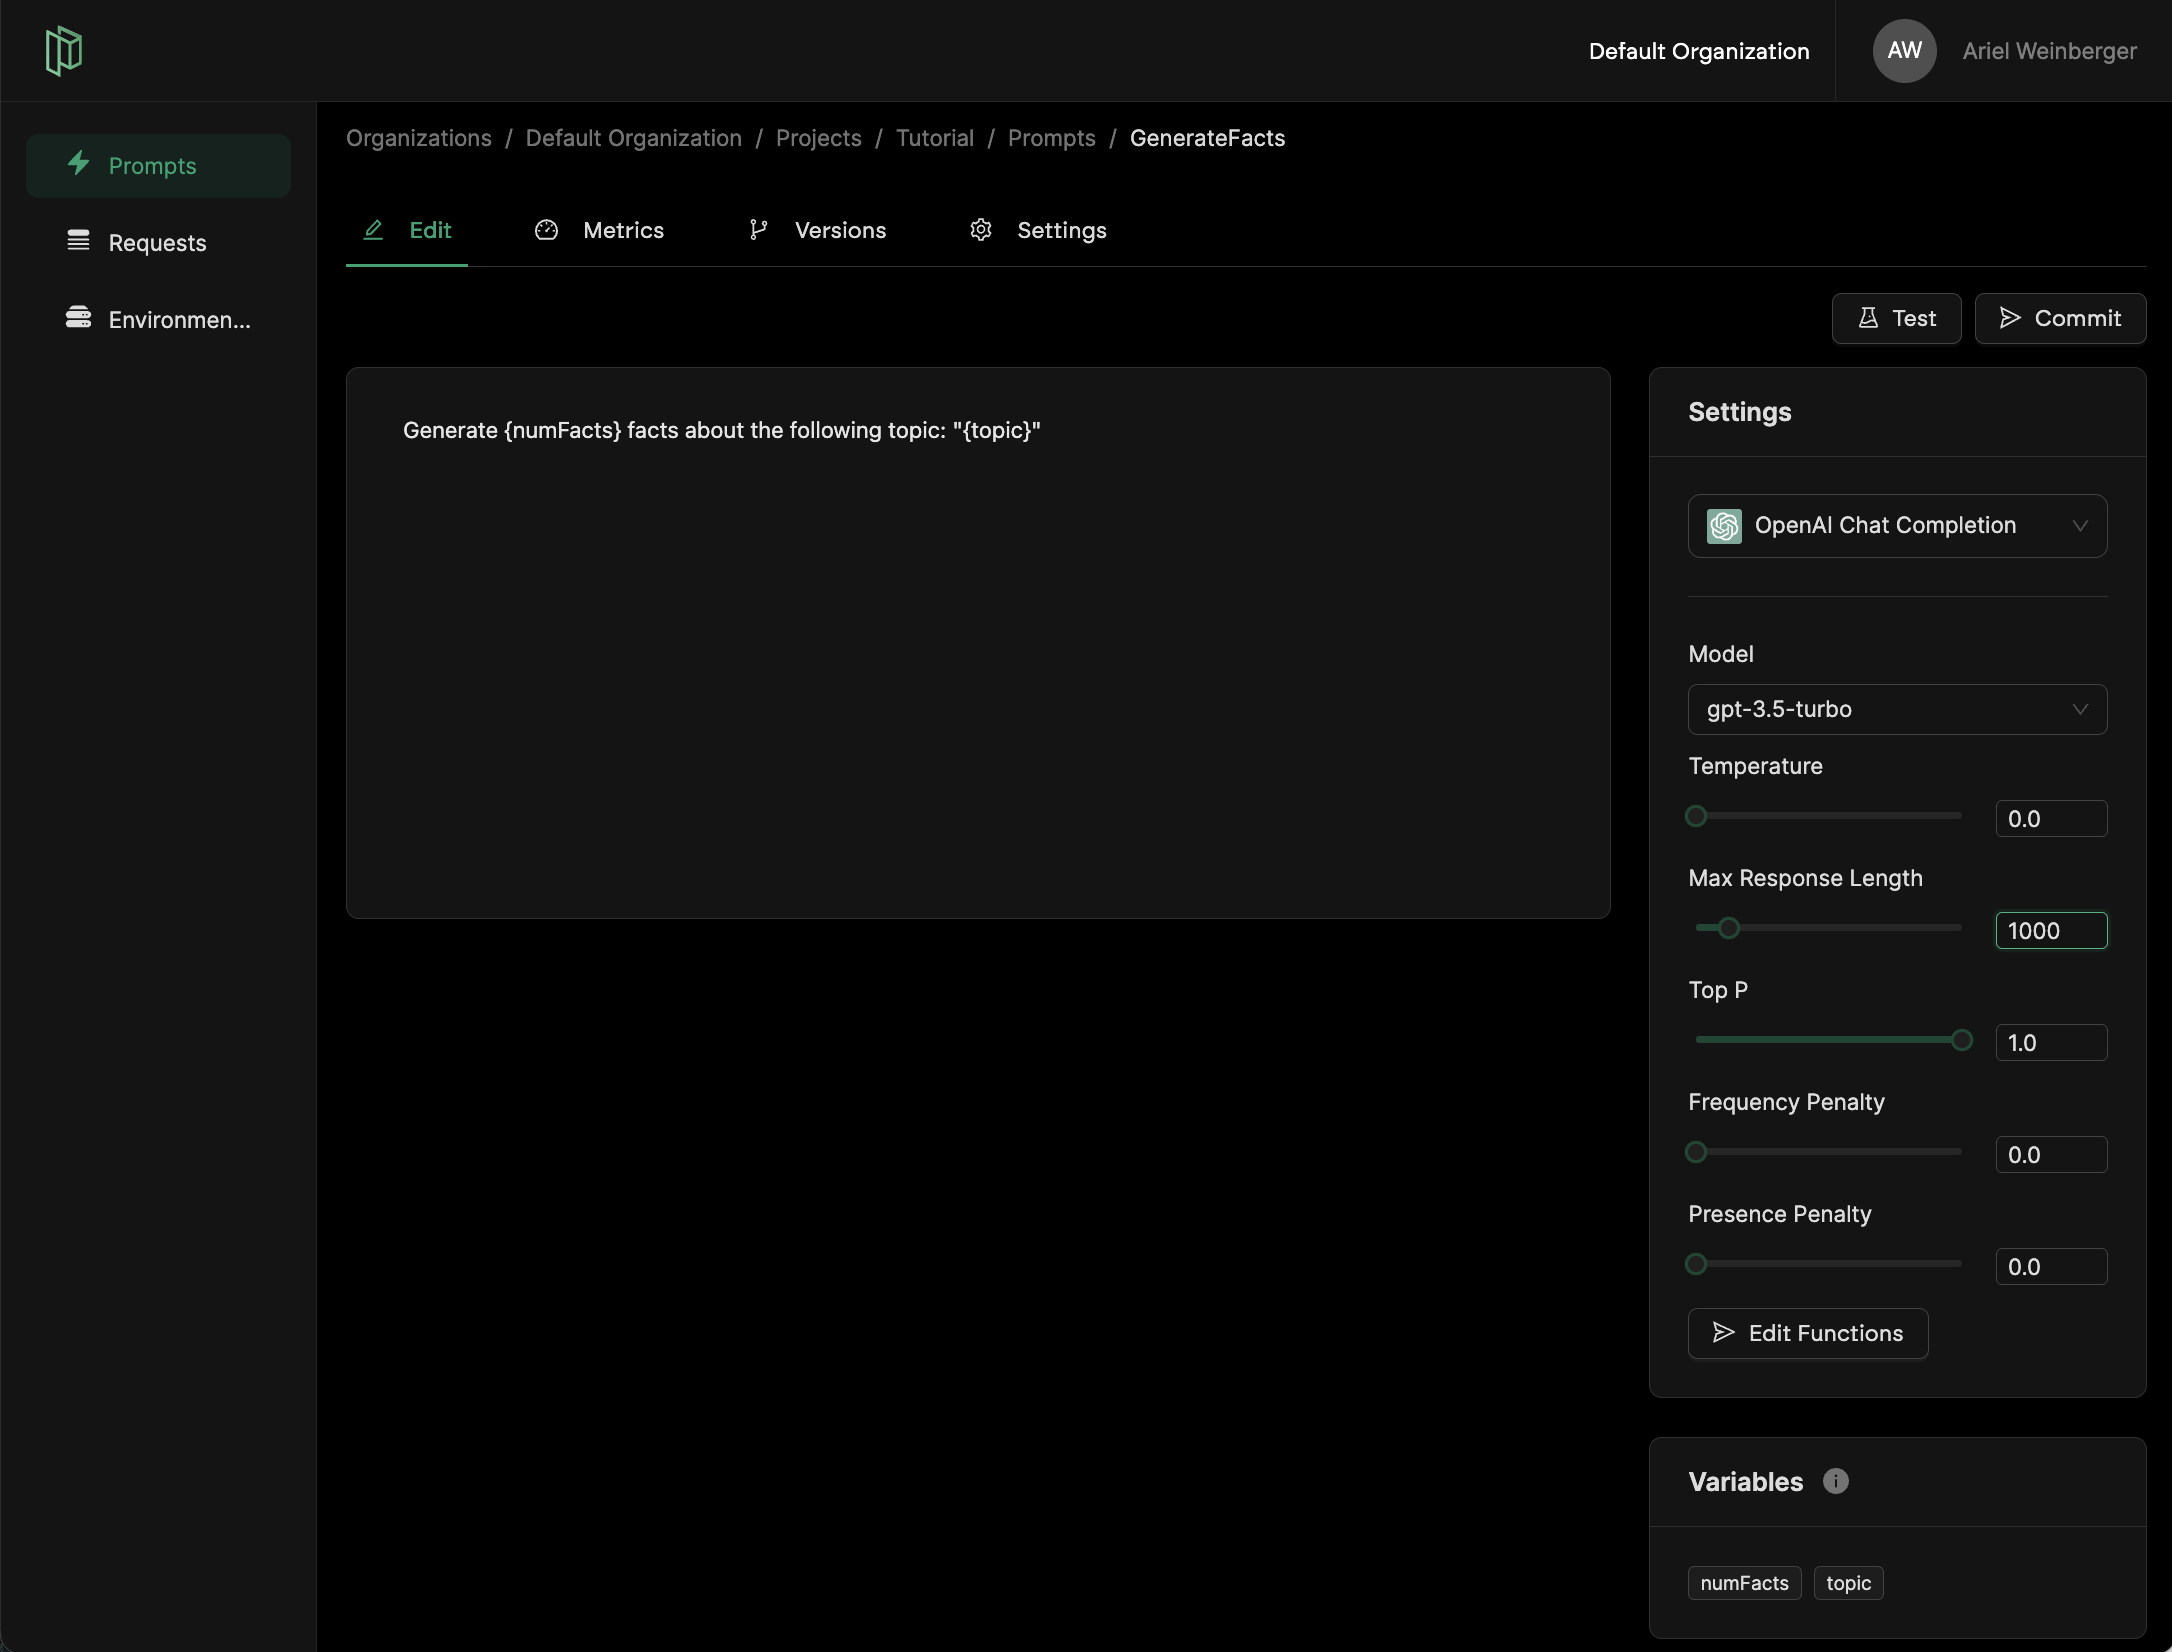
The Prompt Editor is the first screen you will see after selecting/creating a new prompt. This is wehere you will do some prompt engineering, commit and publish your prompts. You can find two main sections in the prompt editor - the Content and the Settings.

Prompt content

The Prompt Content is where you will write your prompt. In our case, we want to ask the LLM (in our case, OpenAI) to generate facts about a topic.

Simply copy and paste the following:

Generate {numFacts} facts about the following topic: "{topic}"

You can define variables in the prompt content by using curly braces. In our case, we define the numFacts and topic variables.

Prompt settings

Depending on the LLM provider, the settings will vary. In our case, we will use the OpenAI API. Feel free to adjust the settings to your liking.

For this tutorial, make the following adjustments:

  • Temperate: 0
  • Max Response Length: 1000

When expecting a structured response or strictly factual data, it’s best to set the temperature to 0. This reduces the chance of “hallucinations”.

The Prompt Editor after defining the content and settings

Testing the prompt

Pezzo allows you to test your prompts before publishing them. This is a great way to quickly iterate on your prompts and make sure they’re working as expected.

To test your prompt, simply click the Test button. This will open a modal where you can enter the values for the variables you defined in the prompt content.

For example, if you want to generate 3 facts about cats, enter the following:
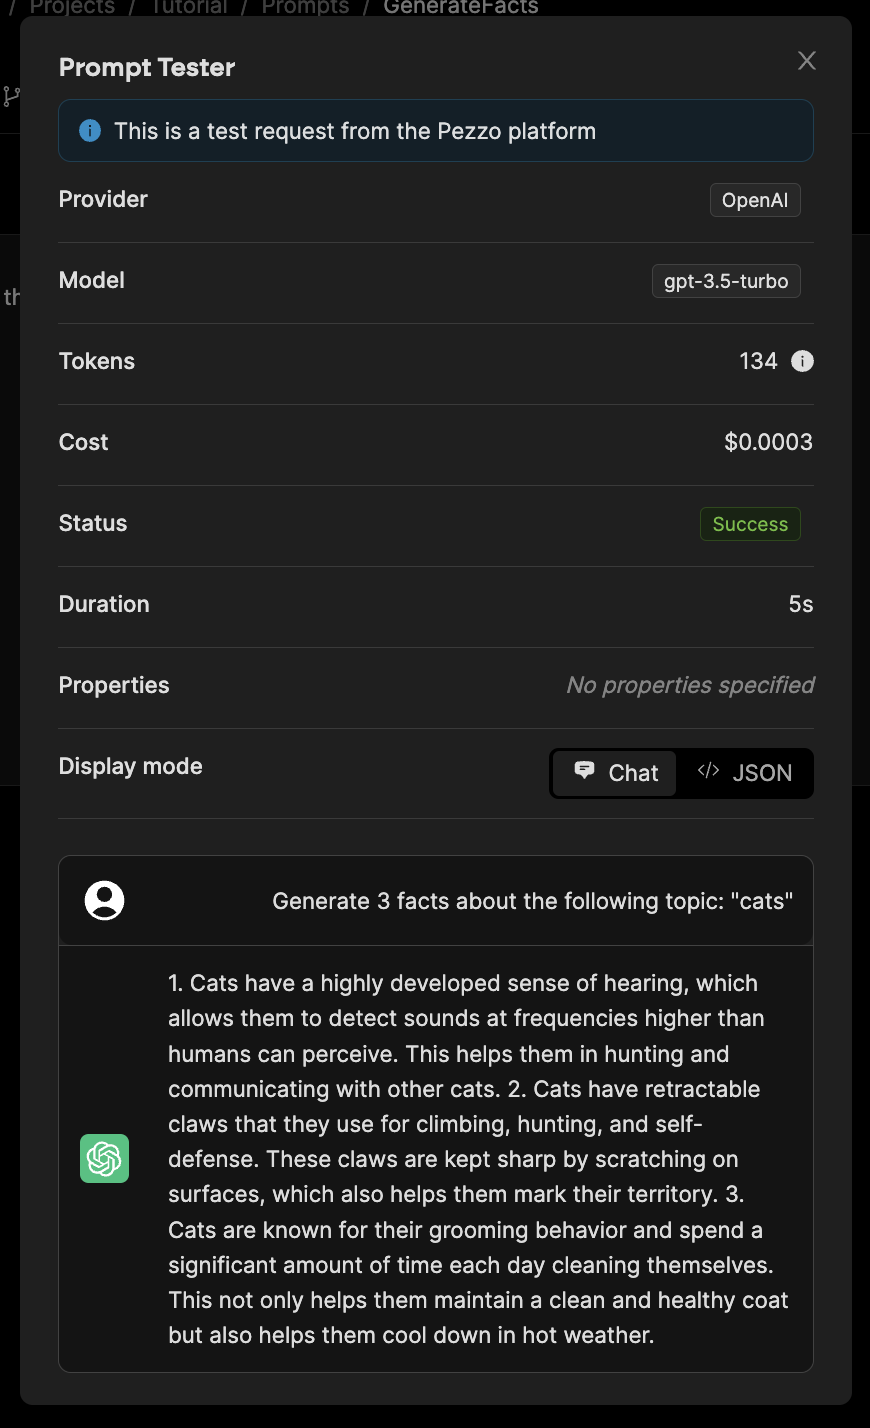
Then, hit Test and wait for the results. You should see something like this:

Prompt Test Results

In the test results you can find plenty of useful information such as:

  • Token usage
  • Cost
  • Status (success, error)
  • Duration
  • Request body
  • Response body

This is extremely useful when debugging prompts and making sure they’re working as expected. Performing tests in Pezzo allows you to ensure that whatever prompt you publish will work as expected, without having to write a single line of code!

Commiting and publishing

Once you’re happy with the prompt, there is one more step you need to do before you can consume it in our application. You need to commit and publish the prompt.

Simply click the Commit button at the top right, and provide a message, such as Initial version. Then, hit Commit.

Commit Modal

Now that you’ve committed the prompt, go ahead and publish it. Click the Publish button at the top right, and choose the desired environment. In our case, we will choose the Production environment.

Publish Modal


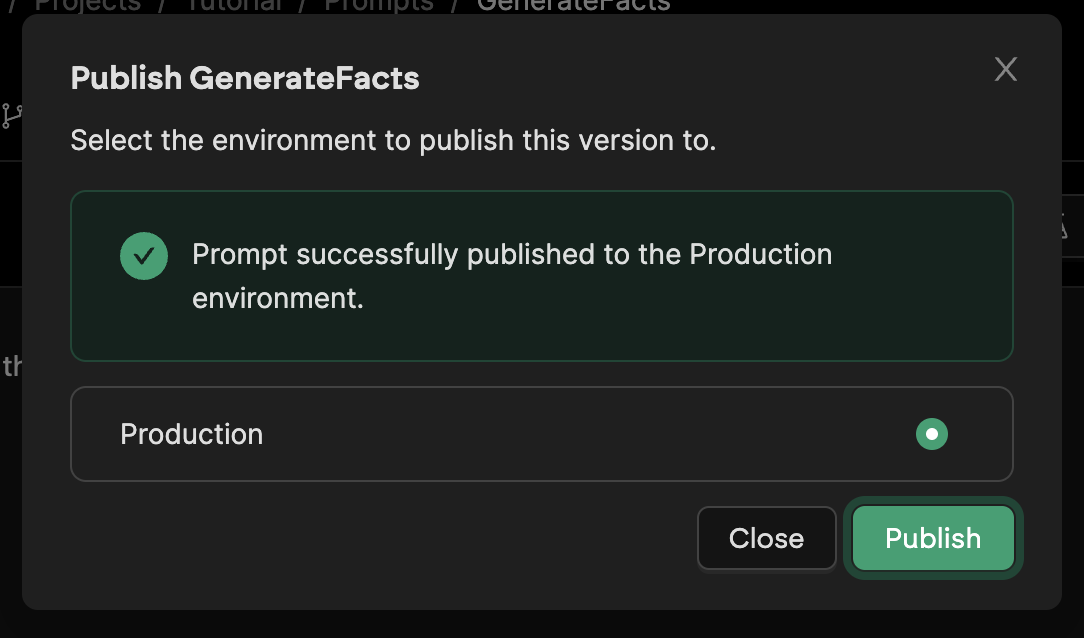
Every Pezzo project comes built in with a Production environment. You can manage your environments in the Environments page of your project.

Congratulations! You’ve just created your first prompt and published it to production. In the next step you’ll learn how to consume it in your application.

Consuming the prompt

In this part of the tutorial, you’ll learn how to consume the prompt you just published in a TypeScript application. For the full Pezzo Client documentation, you can click here.

Install depdendencies

Install the Pezzo Client and the OpenAI SDK:

npm i @pezzo/client openai

Consume prompt via Pezzo Client

Here is a code example:

Node.js
import { Pezzo, PezzoOpenAI } from "@pezzo/client";

// Initialize the Pezzo client
const pezzo = new Pezzo({
  apiKey: "<Your Pezzo API key>",
  projectId: "<Your Pezzo project ID>",
  environment: "Production",
});

// Initialize the OpenAI client
const openai = new PezzoOpenAI(pezzo);

async function main() {
  // Get the deployed "GenerateFacts" prompt version
  const prompt = await pezzo.getPrompt("GenerateFacts");

  // Call the OpenAI API, passing the prompt as an argument. You can override parameters if you wish.
  const response = await openai.chat.completions.create(prompt, {
    variables: {
      // You can define variables that will be interpolated during execution.
      numFacts: 3,
      topic: "Artificial Intelligence",
    },
    properties: {
      // You can optionally specify custom properties that will be associated with the request.
      someProperty: "someValue",
    },
  });
  
  console.log("response", response);
}

main();

Click here to run this example on CodeSandbox

Let’s explain what’s going on here:

  • First, we initialize the Pezzo client and the OpenAI client. We pass the Pezzo client to the OpenAI client so it can use it to fetch the prompt.
  • Then, we fetch the prompt from Pezzo using the getPrompt method. This method returns the latest version of the prompt for the desired environment.
  • Finally, we call the OpenAI API using the createChatCompletion method. This method takes the prompt as an argument and returns the response from the OpenAI API.

Congratulations! You’ve just consumed your first prompt using Pezzo. The Pezzo Client has many more useful capabilities such as variables

Monitoring Requests

Now that you’ve made a request, you should be able to monitor your results in the Requests page. Check it out here.